
Planning a trip can feel overwhelming, but this ultimate travel checklist will guide you through 6 easy steps for a stress-free journey. With a bit of preparation and smart strategies, you can breeze through the process and truly enjoy the excitement of your upcoming adventure.
Here’s my go-to checklist for stress-free travel, built from years of trial, error, and (plenty of) learning the hard way.
Step 1: Planning
Decide Where to Go
Narrowing down your destination is the first step that makes everything else easier. Browse social media, travel blogs, and photography sites for inspiration. Once you’ve got a list of candidates, check if your budget, travel time, and interests match up.
Still undecided? Check out the Destinations page for ideas.
Passport and Visa
Before you start, check if your passport is valid at least six months after the return date. If it doesn’t meet this requirement, you might not be allowed to board your flight or enter certain countries.
Another key aspect of starting your trip is to determine whether your destination requires a tourist visa. Visa processing usually takes one to three weeks, so apply at least a month before departure. Always check official government websites for requirements specific to your nationality. A recent news story even highlighted a couple who relied only on AI for advice and were denied entry—don’t let that happen to you.
Step 2: Booking and Preparation
Build Your Travel Plan
This is where the fun really begins! I love this step because it gets me excited for the trip. I usually spend hours and days mapping out my days, pinning restaurants, and figuring out the best routes. I recommend using Google Sheets or Notion to keep everything in one place, and Google Maps to save must-see attractions, restaurants, and transport hubs into a folder.
To make your trip stress-free, include the following in your travel plan:
- Day-by-day itinerary: Organize by date, adding times and durations for each activity. Arrange items in order and shift them around to maximize your days.
- Must-visit attractions: Start with a master list, then slot them into your schedule. Use Google Maps to group nearby spots into the same day.
- Must-eat restaurants: Research on Google Maps or TripAdvisor, note why each one stood out, and add them to your plan. Prioritize your favorites and match them to days/routes that make sense.
- Expense tracking: Create a table with date, item, seller, payment method, and currency. Add an automatic conversion formula. Start with estimated expenses, then adjust to actual costs while traveling.
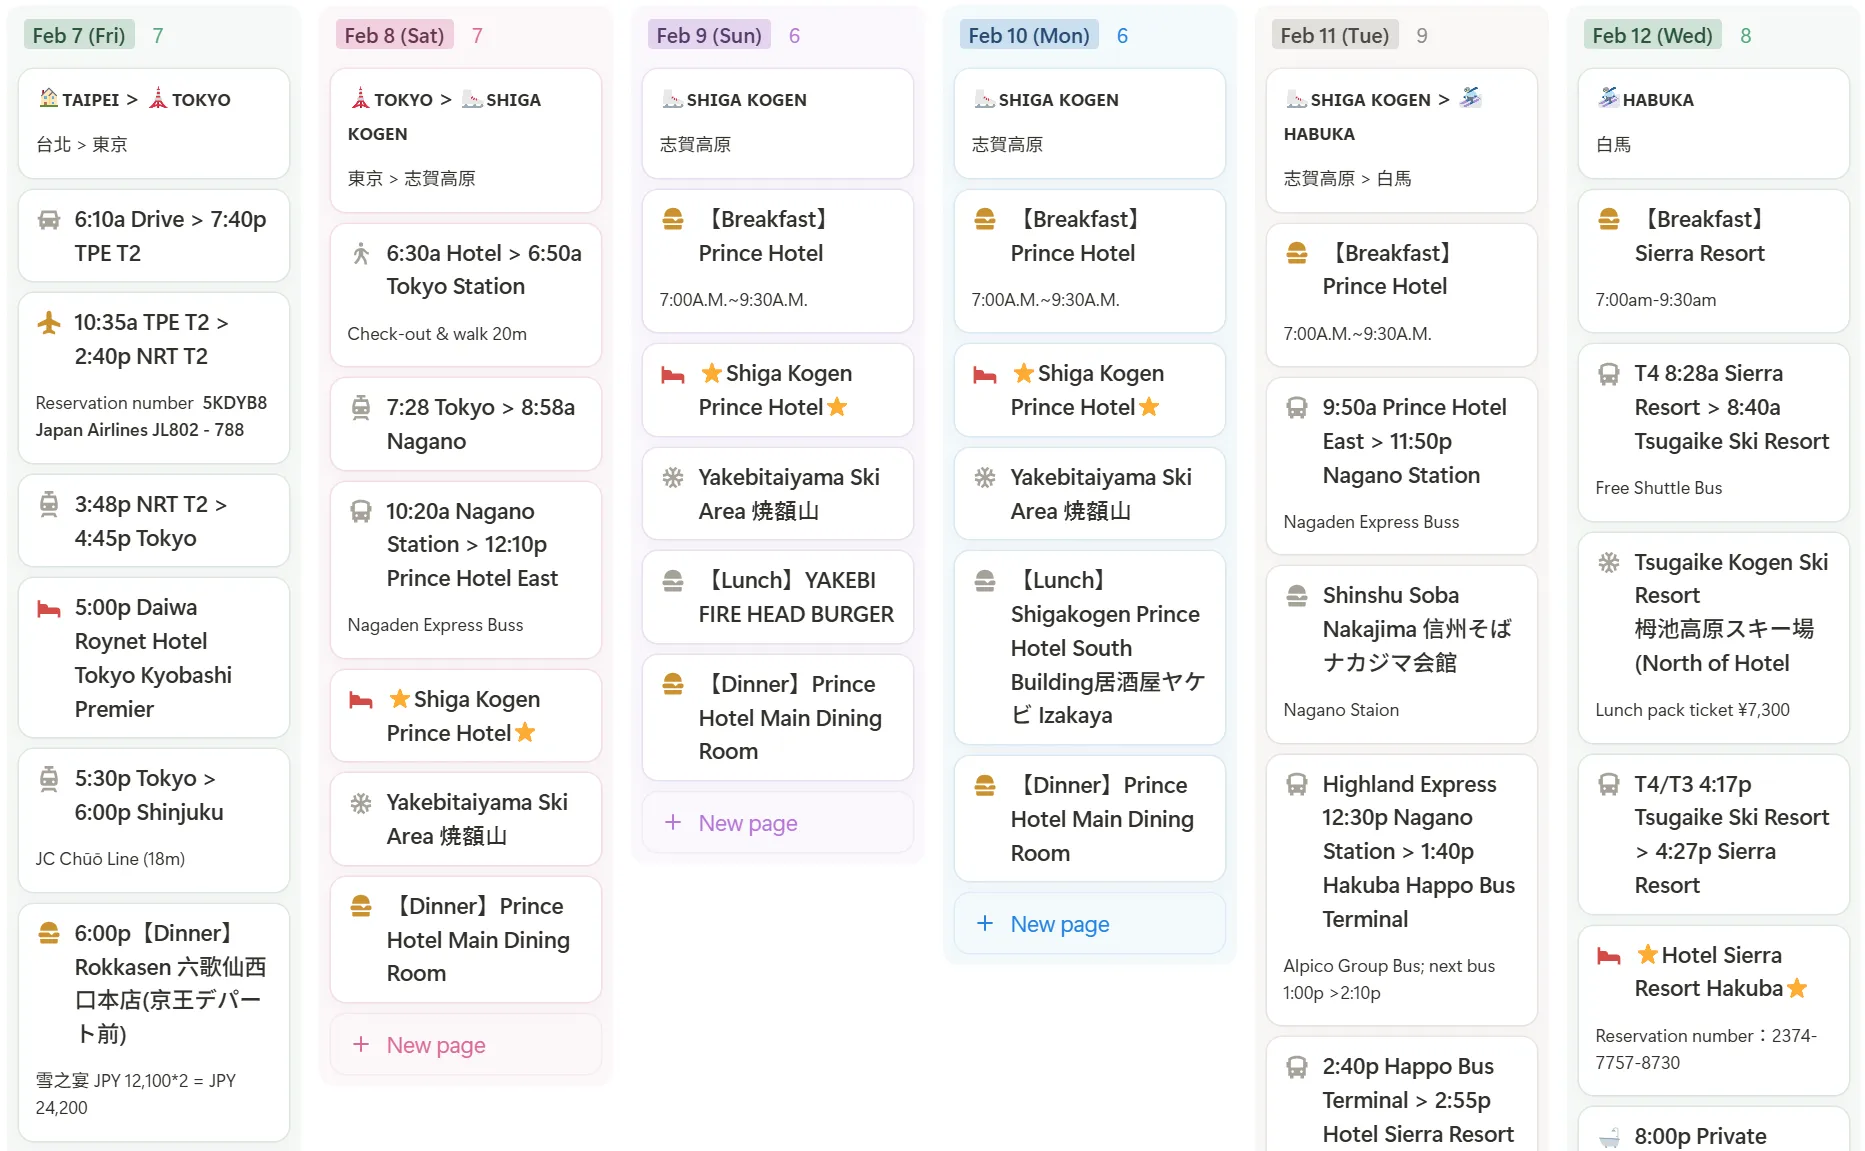
I began with Google Sheets but later switched to Notion as I got more experienced. I have included a screenshot of my ski trip to Nagano below (partial), let me know if you’d like to learn how to build something like this in Notion. I am happy to write a separate step-by-step tutorial on how to build a travel plan with Notion.
Make Smart Bookings
The internet is filled with thousands of booking platforms, but here are the ones I trust and use regularly.
- Accommodation – Agoda: I book about 90% of my stays here because it almost always has the best prices and I’ve never had an issue with reservations.
- Flights – Google Flights & Skyscanner: Perfect for tracking fares across different platforms and spotting the best deals.
- Tours & Experiences – GetYourGuide: My go-to for booking day trips, activities, and unique local experiences.
- eSIM – Airalo & MobiMatter: Both reliable providers; I alternate depending on the destination.
- Travel Insurance – World Nomad: Highly reputable, and unlike many insurers, it covers adventure activities like scuba diving and freediving.
Here are a few more tips that you might find helpful:
- Always check the official hotel websites because sometimes they have better prices.
- Join hotel loyalty programs for immediate discounts and earn points for future stays.
- Book tours in advance. Most tours accept credit cards so you can bring less cash.
- Look for free cancellation and keep monitoring prices so that you can continue to cheaper options.
Monitor Flights & Trains
Airfare fluctuates over time and is especially high closer to the departing date. To get the best deal possible on airfare, start tracking prices at least three months ahead. If your schedule is flexible, aim to book no later than three weeks before departure. Search your desired dates using Skyscanner and Google Maps and save them to monitor price changes. Once you see that the price has hit rock bottom, it’s time to book.
Prepare Your Finances
International and hidden fees can chew into your budget quickly so it’s important to prevent them by doing the following:
- Choose to pay in the local currency when using credit cards for the best exchange rate possible.
- Bring multiple credit cards (Visa & MasterCard are safest) and ATM cards so that you a backup when needed.
- Enable transaction alerts via email so that you are notified of every credit card payment.
- Check if your credit cards require a PIN overseas. Some payment terminals require every transaction to be approved with a passcode.
- Carry extra cash in USD bills for tips and emergencies.
Step 3: Packing & Readiness
Buy an eSIM
eSIM is the easiest and fastest way to maintain connection while traveling. Rather buying a physical SIM card when you arrive, get an eSIM from Airalo or MobiMatter before you leave and use this link for 15% off your first eSIM through Airalo.
Download Apps in Advance
Install ride-hailing, metro/bus apps, offline maps, and even food delivery apps on your phone. Having them ready saves both time and data.
Electronics
Bring chargers for every device plus one or two power banks. Don’t forget universal adapters and, if possible, a portal travel power strip so that you can power everything at once.
What to Bring
Aside from your usual everyday wear, I recommend bringing the following along.
- Sanitation wipes: Keeping germs away is important, sanitation wipes can be used to clean utensils, surfaces, and most importantly our hands. I recommend bringing more than enough so that you can have a peace of mind.
- Over-the-counter medicines: Having remedies for fever, flu, pain, and stomach while traveling will save the headache of trying to find a pharmacy mid-trip. They can prevent symptoms from developing into something serious, which is the last thing you want on any trip.
- Sunscreen & sunglasses: UV rays are strong even on cloudy days. Protect yourself from harmful UVs by applying sunscreen. Additionally, bring sunglasses for style options and sun protection.
- Disposable underwear & socks (optional): Not entirely eco-friendly, but having disposable personal items comes in handy for long trips.
- One formal outfit: Some establishments have specific dress codes so having at least one outfit that can get you in restaurants, concerts, and events is definitely a plus.
Travel Documents
Before leaving home, double-check that you have passports, visas, insurance, and tickets with you. I would also keep photo scans of the passport and visa just in case.
Step 4: Transitting
Airport Transfer
Plan your airport drop-off ahead of time, either by car, bus, or train. Always aim to arrive at the airport at least 3 hours before your flight. I live 2 hours from my main airport, so I book a shuttle 5 hours before departure for peace of mind.
Layovers
If you have a transfer through another country, check whether you need a transit visa. It also helps to research dining options in the terminal so you know where to relax between flights. If you have access to airline lounges, you can also search ahead to see what options are available.
Electronics with Batteries
Airlines don’t allow batteries in checked luggage, so keep cameras, laptops, power banks, and spare batteries in your carry-on. I use a pouch for small items like power banks and camera batteries so they’re easy to pull out at security. Don’t be that guy that takes 10 minutes to clear security!
Step 5: Arriving
Activate Your eSIM
If your eSIM has a limited number of days, wait until you land to activate it so coverage lasts your whole trip. If your coverage is long, I recommend activating before you board your departure flight.
Exchange Local Currency
Most airports have money exchange counters. Rates aren’t always great, so consider exchanging a small amount there and the rest in the city if possible.
Airport Pickup
Ask your accommodation if they provide pickup. If not, ride-hailing apps (Uber, Grab, etc.) are often cheaper and safer than airport taxis. If you do take a taxi, confirm the price before getting in.
Step 6: Doing
Follow Your Travel Plan
If you’ve done all the above, your itinerary is your guidebook, and you have everything you need to enjoy a stress-free trip. Remember be flexible and just have fun in case plans change.
Track Your Spending
Write down every expense, no matter how small. I jot down everything in my phone’s Notes app throughout the day, then transfer them into my travel plan each night. It’s the easiest way to avoid overspending.
In Conclusion
With these planning tips, you can enjoy the thrill of planning without drowning in to-do lists. Remember: a well-prepared traveler is a happy traveler. Now pack your bag and start your adventure with confidence!